Common failure modes
Most starter problems are environmental or scheduling issues, not permanent damage. Temperature swings, feed timing drift, and over-dilution create instability that looks worse than it is.
The first step is calm diagnosis. What changed this week compared to when it was healthy.
Most bakers remember one frustrating loaf that looked promising until the final step collapsed. In nearly every case, the turning point happened here. Slow down, watch texture and movement, and avoid heroic last-minute fixes. This stage rewards consistency more than creativity, and that is excellent news because consistency is trainable.
Practical routine: set a 30-minute interval timer, then capture three notes at each checkpoint. Record room temperature, dough temperature, and one texture cue such as smoothness, stickiness, or bounce. This takes less than a minute and turns guesswork into a timeline you can compare across bakes.
When this stage clicks, the rest of the bake day feels lighter. You are no longer reacting to surprises; you are guiding outcomes. That shift from reactive to intentional baking is where confidence is built, and it shows up in the crumb as much as in your workflow.
Finish with a one-line decision log that includes why you moved on when you did. On your next bake, compare that decision to the final loaf quality. Over a few bakes, this creates a practical feedback loop you can trust.
For Troubleshooting Starter Issues, the common failure modes phase is where confidence is earned through repeatable decisions. Work with intentional pacing: observe, choose one adjustment, and give it time to show a result. If you keep clean notes on what changed and why, your next bake starts with evidence instead of guesswork, and that is usually the difference between random success and reliable outcomes.
Slow rise
Usually points to low temperature, weak feeding cadence, or both.
Warm slightly and run consistent daily cycles before judging outcome.
This is one of those moments where the dough gives honest feedback. If it tears, tightens, or loses shape too quickly, treat that as information and adjust gradually instead of pushing through.
A practical checkpoint is to take a quick photo and a short note at the start and end of this sub-step. Visual comparison over time will reveal progress that is hard to notice in the moment, especially when bake days are spread across weeks.
During slow rise, focus on deliberate technique over speed. A controlled motion, a short pause, and a quick check of dough response will usually teach you more than pushing forward fast. Treat this as a skill rehearsal, and the payoff shows up later in cleaner structure, more predictable fermentation, and stronger final oven spring.
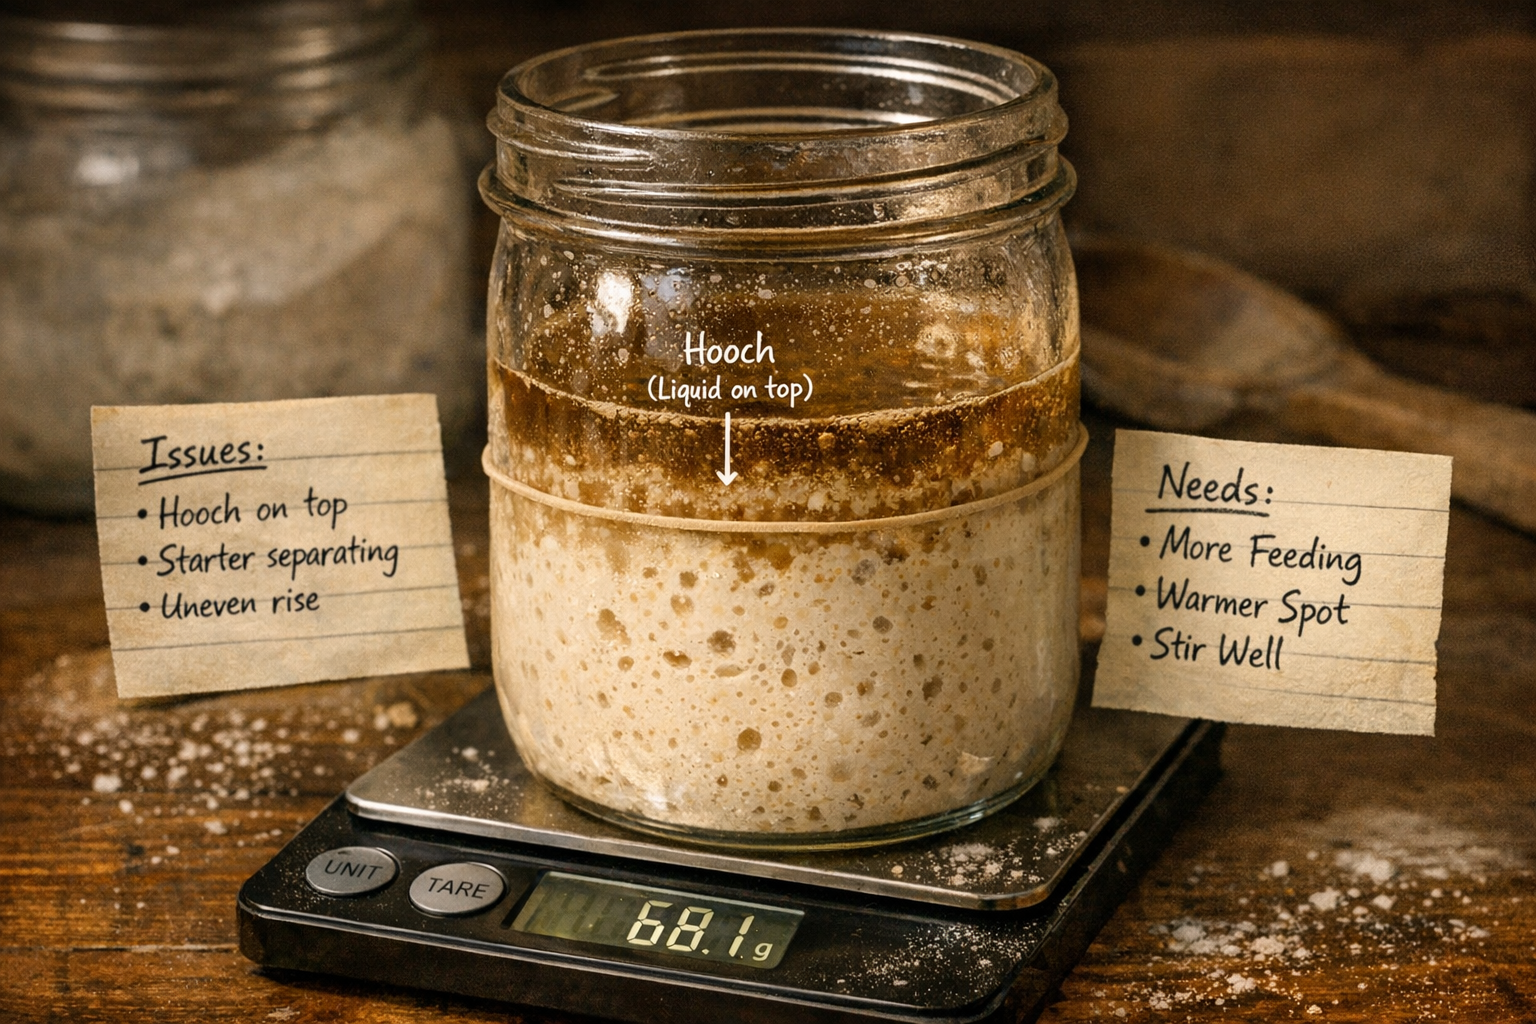
Harsh smells
Acetone-like notes often mean hunger. Increase feeding frequency or reduce ratio dilution temporarily.
Hooch is a signal to feed, not an automatic disaster.
In practice, this sub-step is where many bakers either gain control or lose momentum. It helps to slow your hands down and read the dough deliberately. Clean, repeatable motions beat force every time.
Concrete adjustment plan: keep one variable fixed for two consecutive bakes, then tune only one setting at a time. Useful candidates are hydration by 1 to 2 percent, rest windows by 10 to 15 minutes, or proof temperature by 1 to 2 degrees. Small moves are easier to evaluate accurately.
During harsh smells, focus on deliberate technique over speed. A controlled motion, a short pause, and a quick check of dough response will usually teach you more than pushing forward fast. Treat this as a skill rehearsal, and the payoff shows up later in cleaner structure, more predictable fermentation, and stronger final oven spring.
Recovery plan
Recovery works best when changes are controlled and repeated. Clean jar. Reliable timing. Appropriate warmth. Moderate feed ratios. Then observe over several cycles.
In severe contamination cases with visible mold, restart safely. But most sluggish starters recover with patience and structure.
Picture a Saturday morning bake where everything is almost right, but one rushed decision in this stage quietly changes the final loaf. That is why this part of the process deserves patience. Treat it like a calm sequence of observations instead of a race against the clock, and you will usually feel the dough start to cooperate rather than resist.
Run this stage with a simple checklist beside your bowl or banneton: target temperature range, expected visual cues, and a stop condition. When the stop condition is met, move on confidently. This single habit prevents overhandling and protects both structure and flavor.
There is usually a moment in this stage where uncertainty spikes and the temptation is to intervene aggressively. Resist that impulse. The bakers who improve fastest are the ones who make calm, measurable corrections and let fermentation do its work.
End the stage with one written takeaway tied to an action. Example: dough felt tight at checkpoint two, so next bake increase rest time by 10 minutes before the next fold. Action-linked notes are the fastest path to repeatable progress.
For Troubleshooting Starter Issues, the recovery plan phase is where confidence is earned through repeatable decisions. Work with intentional pacing: observe, choose one adjustment, and give it time to show a result. If you keep clean notes on what changed and why, your next bake starts with evidence instead of guesswork, and that is usually the difference between random success and reliable outcomes.
Feeding resets
Run a short reset protocol with predictable feed intervals and modest ratios.
Use whole grain support flour for one or two cycles if activity is very weak.
This is one of those moments where the dough gives honest feedback. If it tears, tightens, or loses shape too quickly, treat that as information and adjust gradually instead of pushing through.
A practical checkpoint is to take a quick photo and a short note at the start and end of this sub-step. Visual comparison over time will reveal progress that is hard to notice in the moment, especially when bake days are spread across weeks.
During feeding resets, focus on deliberate technique over speed. A controlled motion, a short pause, and a quick check of dough response will usually teach you more than pushing forward fast. Treat this as a skill rehearsal, and the payoff shows up later in cleaner structure, more predictable fermentation, and stronger final oven spring.
Environment control
Stable warmth is often the missing variable.
Consistency in placement can improve behavior more than recipe tweaks.
In practice, this sub-step is where many bakers either gain control or lose momentum. It helps to slow your hands down and read the dough deliberately. Clean, repeatable motions beat force every time.
Concrete adjustment plan: keep one variable fixed for two consecutive bakes, then tune only one setting at a time. Useful candidates are hydration by 1 to 2 percent, rest windows by 10 to 15 minutes, or proof temperature by 1 to 2 degrees. Small moves are easier to evaluate accurately.
During environment control, focus on deliberate technique over speed. A controlled motion, a short pause, and a quick check of dough response will usually teach you more than pushing forward fast. Treat this as a skill rehearsal, and the payoff shows up later in cleaner structure, more predictable fermentation, and stronger final oven spring.
Join hundreds of other bakers now
Keep your starter, recipes, and bake journal in one place.
Download Kneadly