Why this works
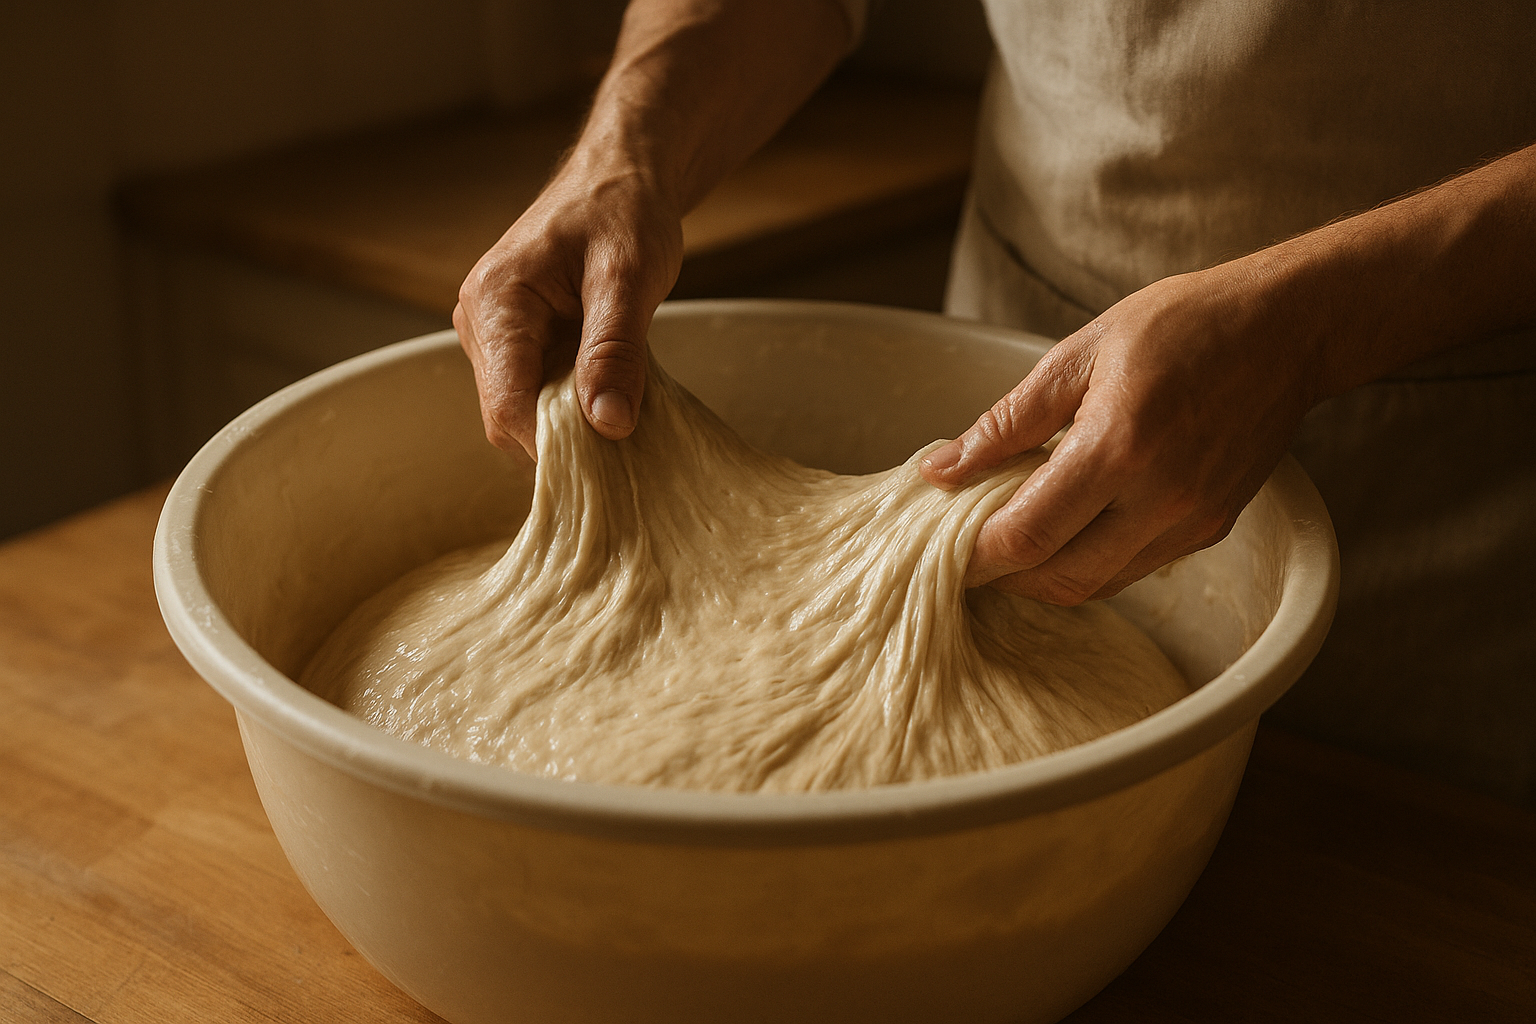
Stretch and folds are deceptively simple. Pull, fold, rotate, repeat. But the effect is powerful. You develop gluten gradually while keeping the dough airy.
Compared with aggressive kneading, this method respects fermentation structure. The dough becomes smoother and more cohesive with each set, and your hands learn how strength feels in real time.
If this step feels unpredictable, you are not doing anything wrong. It simply has more moving parts than it appears at first glance. Think of it as an interview with your dough: you ask questions through touch, tension, and timing, and the dough answers through resistance, elasticity, and gas retention.
Use a short control loop to keep decisions clean: observe, adjust one variable, and wait one interval before adjusting again. For most kitchens, that interval is 20 to 30 minutes. Rapid stacked changes make troubleshooting harder because you will not know which adjustment actually helped.
A reliable pattern many home bakers use is to treat the first attempt as a calibration bake. They do not chase perfection. They focus on readable signals and clean notes. By the second or third bake, small improvements stack: cleaner shaping, better spring, and far less second-guessing.
Before moving forward, do a quick debrief: what cue looked strongest, what cue appeared late, and what you would change by plus or minus 15 minutes next time. These tiny post-step notes make future decisions faster and more accurate than relying on memory alone.
For Mastering Stretch and Folds, the why this works phase is where confidence is earned through repeatable decisions. Work with intentional pacing: observe, choose one adjustment, and give it time to show a result. If you keep clean notes on what changed and why, your next bake starts with evidence instead of guesswork, and that is usually the difference between random success and reliable outcomes.
Strength over time
Each set adds alignment to the gluten network. The pause between sets lets fermentation continue and the dough relax.
That alternation of effort and rest is the key.
In practice, this sub-step is where many bakers either gain control or lose momentum. It helps to slow your hands down and read the dough deliberately. Clean, repeatable motions beat force every time.
Concrete adjustment plan: keep one variable fixed for two consecutive bakes, then tune only one setting at a time. Useful candidates are hydration by 1 to 2 percent, rest windows by 10 to 15 minutes, or proof temperature by 1 to 2 degrees. Small moves are easier to evaluate accurately.
During strength over time, focus on deliberate technique over speed. A controlled motion, a short pause, and a quick check of dough response will usually teach you more than pushing forward fast. Treat this as a skill rehearsal, and the payoff shows up later in cleaner structure, more predictable fermentation, and stronger final oven spring.
Gas retention
Gentle handling keeps internal bubbles more intact, leading to better expansion and a more open crumb.
Overhandling can flatten those gains quickly.
A common real-world scenario is that this detail feels minor until it compounds with temperature and timing. Then it suddenly becomes the difference between a loaf that opens beautifully and one that feels flat. Paying attention here is not overthinking; it is leverage.
When you review your notes, look for repeatable patterns rather than isolated wins. If the same adjustment improves handling and final crumb twice in a row, lock it in as part of your baseline process.
During gas retention, focus on deliberate technique over speed. A controlled motion, a short pause, and a quick check of dough response will usually teach you more than pushing forward fast. Treat this as a skill rehearsal, and the payoff shows up later in cleaner structure, more predictable fermentation, and stronger final oven spring.
Execution details
Most doughs respond well to four to six sets in early bulk, spaced around thirty minutes apart. Use wet hands. Move confidently. Stop tugging when resistance rises.
If dough is very wet, coil folds can be cleaner and gentler. Lift from the center, let the ends tuck naturally, and repeat.
Picture a Saturday morning bake where everything is almost right, but one rushed decision in this stage quietly changes the final loaf. That is why this part of the process deserves patience. Treat it like a calm sequence of observations instead of a race against the clock, and you will usually feel the dough start to cooperate rather than resist.
Run this stage with a simple checklist beside your bowl or banneton: target temperature range, expected visual cues, and a stop condition. When the stop condition is met, move on confidently. This single habit prevents overhandling and protects both structure and flavor.
There is usually a moment in this stage where uncertainty spikes and the temptation is to intervene aggressively. Resist that impulse. The bakers who improve fastest are the ones who make calm, measurable corrections and let fermentation do its work.
End the stage with one written takeaway tied to an action. Example: dough felt tight at checkpoint two, so next bake increase rest time by 10 minutes before the next fold. Action-linked notes are the fastest path to repeatable progress.
For Mastering Stretch and Folds, the execution details phase is where confidence is earned through repeatable decisions. Work with intentional pacing: observe, choose one adjustment, and give it time to show a result. If you keep clean notes on what changed and why, your next bake starts with evidence instead of guesswork, and that is usually the difference between random success and reliable outcomes.
Timing sets
Early bulk is the best window. Later in fermentation, folds can degas more than they help.
Look for smoother surface and better shape retention after each set.
In practice, this sub-step is where many bakers either gain control or lose momentum. It helps to slow your hands down and read the dough deliberately. Clean, repeatable motions beat force every time.
Concrete adjustment plan: keep one variable fixed for two consecutive bakes, then tune only one setting at a time. Useful candidates are hydration by 1 to 2 percent, rest windows by 10 to 15 minutes, or proof temperature by 1 to 2 degrees. Small moves are easier to evaluate accurately.
During timing sets, focus on deliberate technique over speed. A controlled motion, a short pause, and a quick check of dough response will usually teach you more than pushing forward fast. Treat this as a skill rehearsal, and the payoff shows up later in cleaner structure, more predictable fermentation, and stronger final oven spring.
When to stop
Stop when dough holds form, feels springy, and no longer gains much from another set.
More is not always better.
This is one of those moments where the dough gives honest feedback. If it tears, tightens, or loses shape too quickly, treat that as information and adjust gradually instead of pushing through.
A practical checkpoint is to take a quick photo and a short note at the start and end of this sub-step. Visual comparison over time will reveal progress that is hard to notice in the moment, especially when bake days are spread across weeks.
During when to stop, focus on deliberate technique over speed. A controlled motion, a short pause, and a quick check of dough response will usually teach you more than pushing forward fast. Treat this as a skill rehearsal, and the payoff shows up later in cleaner structure, more predictable fermentation, and stronger final oven spring.
Join hundreds of other bakers now
Keep your starter, recipes, and bake journal in one place.
Download Kneadly